Why do I need to do this?
For ✨security✨…
From August 2021, GitHub announced they would not be allowing password authentication when using the command line to interact with github.com [1] .
This means that in order to interact with GitHub from the command line you have to create an “authentication token”.
What are authentication tokens?
An Authentication Token (auth token) is a piece of information that verifies the identity of a user to a website, server, or anyone requesting verification of the user’s identity.
– Twilio [2]
How do I create an authentication token?
Visit https://github.com/settings/tokens. This can also be found by navigating to “Settings>Developer Settings>Personal access tokens>Tokens (classic)”
You can then create a new token with the “Generate new token (classic)” button. You can also create fine-grained tokens for individual repositories, but for general use classic tokens are easier.
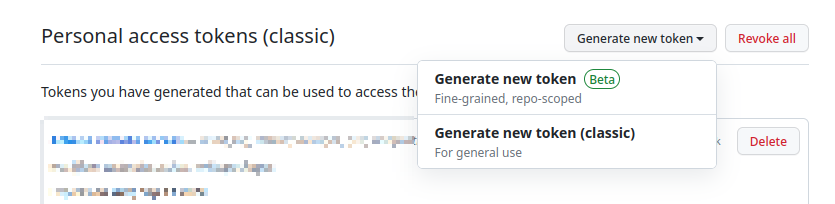
Screenshot of the button to generate a new token.
After you have pressed this button, you may be prompted for 2-factor authentication. Once you have authenticated, you should see a screen like this:
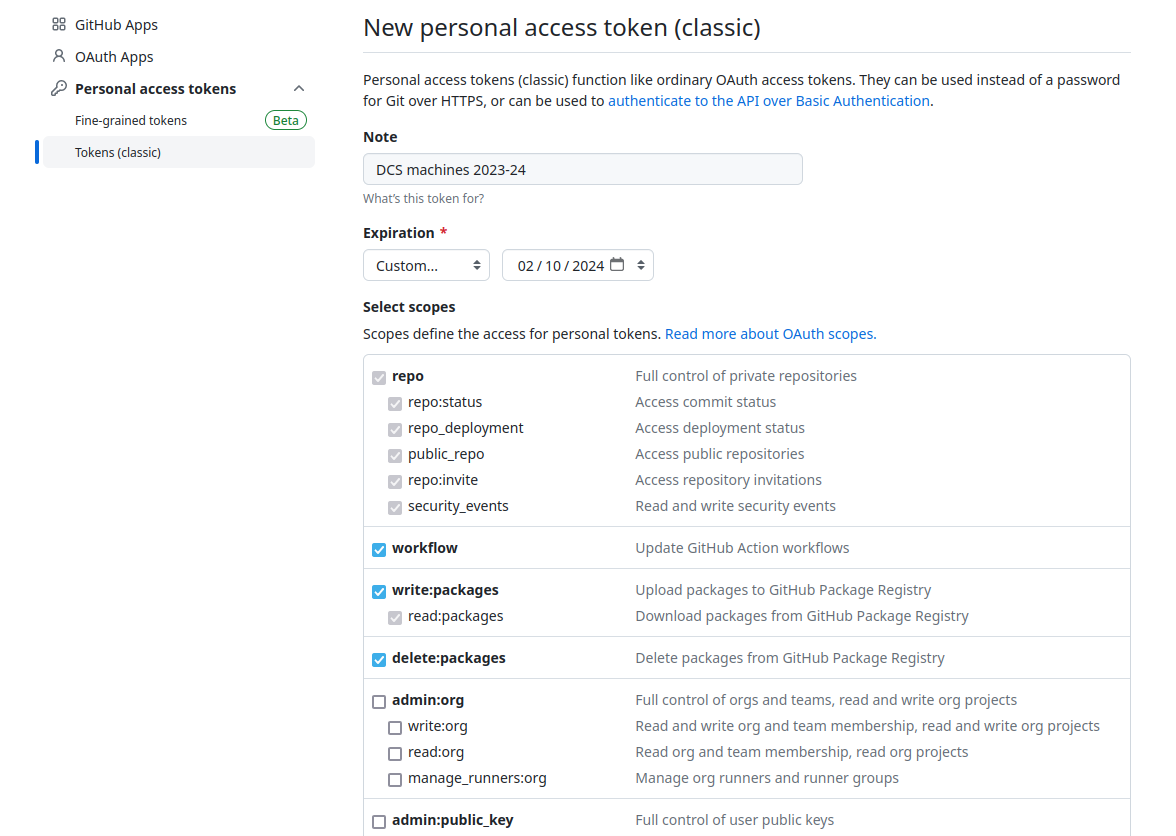
Screenshot of the screen to create a new token.
There are three things you want to set here:
- Give your token a meaningful name! For example, the name of the machine where it will be used, and what it will be used for. This also implies the good practice of not re-using tokens, meaning revoking them is a low-cost operation.
- Set an appropriate expiry date for your token.
- Select the scopes for the token. A possible general set of scopes for common tasks is:
repoworkflowuser
Once you have set all these fields, click the green “Generate token” button at the bottom of the page. After the button is pressed a screen like this should be shown:
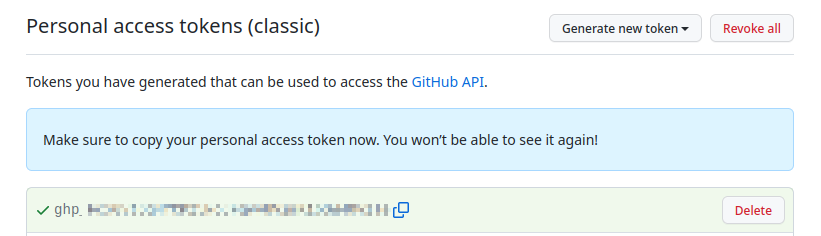
Screenshot of the screen once a new token is created.
The generated token should start with a ghp_ prefix.
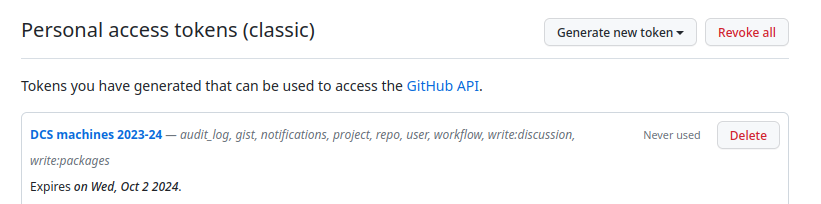
Screenshot of the screen to delete a token.
You can also read a different set of instructions for this process on the GitHub website [3] .
How do I use it on my computer?
Once you have generated a token, you need to add it to the machine you intend to use it
on. There are various ways to do this, but in this tutorial we will use the git credential
store helper. This stores the token in a plaintext format in your home directory.
This is not an ideal solution, but since the file permissions are set to only be
readable to your user account, and tokens can easily be revoked if compromised, it is
probably an acceptable amount of risk for personal systems. Depending on your threat
vectors and the type of system being used, this may be an unacceptable level of risk,
in which case you should investigate a different storage strategy.
To store your token, in a terminal type [4] :
1git config --global credential.helper store
Then, make a commit or otherwise interact with the GitHub site from the command line. You will be prompted for your username and password. Enter the email address for your GitHub account for the username, and paste the token as the password.
You should then be able to make commits in future without being prompted for your credentials again.
What did that just do?
To see where your credentials are stored, in a terminal type:
1vim ~/.git-credentials
This will open the file, and you should be able to see your email and token in this file.
You can also confirm the file permissions for this file as readable only by you by typing in a terminal:
1ls -alFh | grep credentials
Which should print something similar to:
1-rw------- 1 <username> <username> 85 <date> .git-credentials
References
- [1]: https://github.blog/changelog/2021-08-12-git-password-authentication-is-shutting-down/
- [2]: https://www.twilio.com/docs/glossary/what-is-an-authentication-token
- [3]: https://docs.github.com/en/authentication/keeping-your-account-and-data-secure/managing-your-personal-access-tokens#creating-a-personal-access-token-classic
- [4]: https://stackoverflow.com/a/64632086